Sep 30, 2026Buying Guides
How Are Makeup Brushes Made? 13-Step OEM Manufacturing Process
1. Bristle Color Comparing 2. Bristle Restructuring 3. Weighing 4. Combing 5. Bristle Tidying 6. Bristle Binding 7. Roots Shaving 8. Bristle Nesting And Thread Removing 9. Size Measuring
How Are Makeup Brushes Made? 13-Step OEM Manufacturing Process
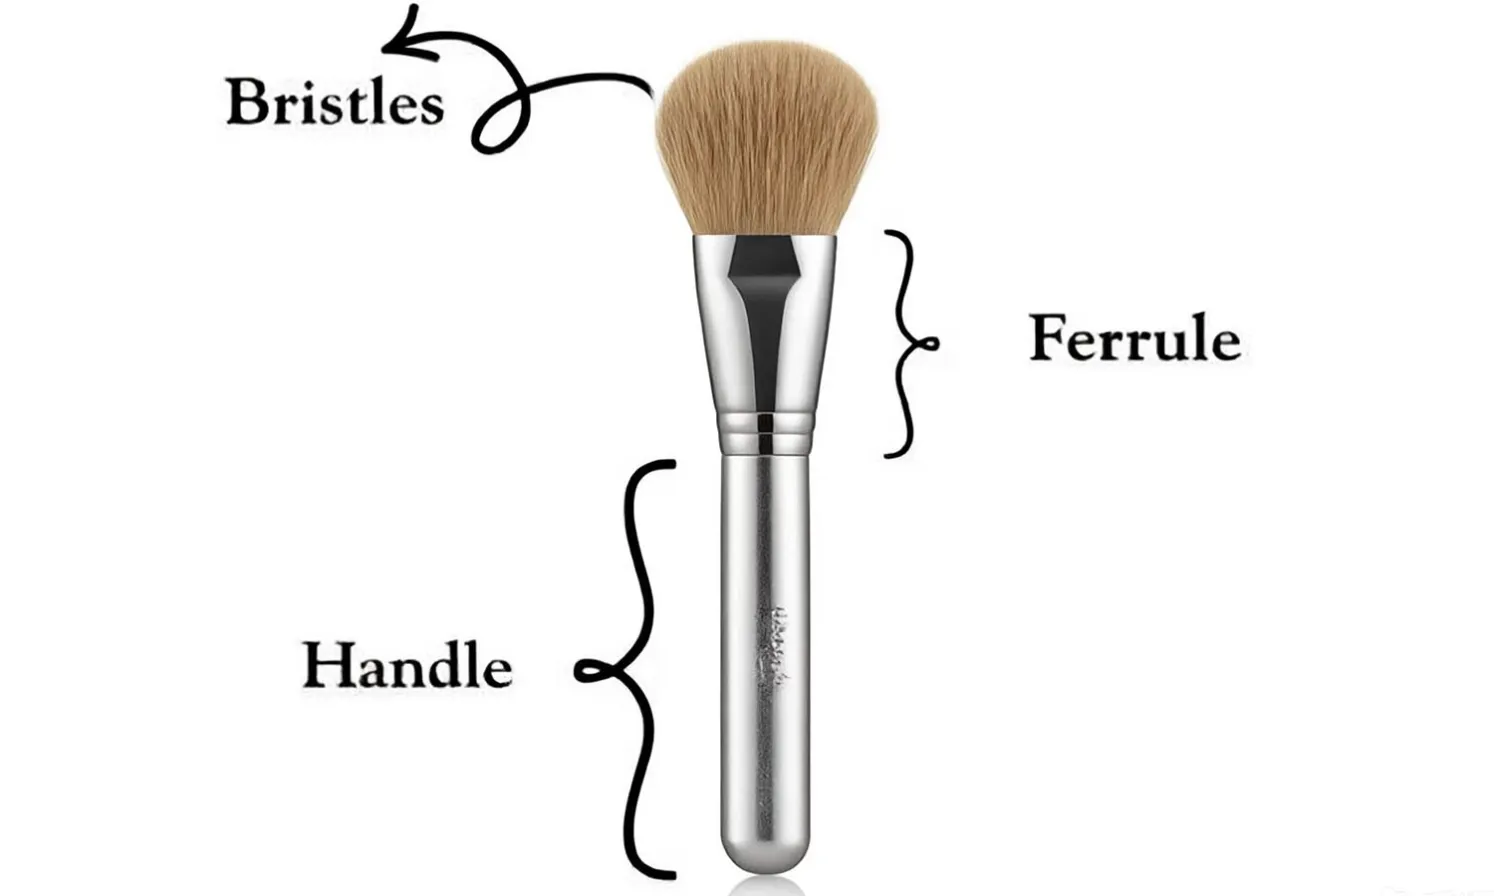
Whether you use makeup brushes or distribute them, you might be curious about how they are made. A makeup brush consists of three parts: the bristles, the ferrule, and the handle. The processing of these components and the way they are assembled involve many critical details; skilled artisans are required to perform this work by hand to ensure the production of high-quality brushes. Creating a perfect makeup brush requires 13 manufacturing steps.
1.Bristle Color Comparing
First, remove the packaging from the purchased bristles. Then, compare the color of the raw bristles with that of the brush sample to ensure the bulk-ordered brushes match the sample's color.
2.Bristle Restructuring
We remove bristles with inverted roots and align all bristles in the same direction to prevent the prickly sensation caused by coarse root ends. Broken or inverted bristles are discarded to ensure proper alignment, and stray or short bristles are also culled. Although removing inverted bristles inevitably results in the loss of some usable bristles, we prioritize comfort—ensuring the brush does not prick the skin—and do not hesitate to discard any problematic bristles. Finally, the inspected bristles are bundled and stored in the semi-finished goods warehouse.
3.Weighing
The bristles are the soul of a makeup brush, and their weight is a crucial factor influencing performance. Consistent bristle weight ensures uniform quality, but it must also be properly balanced with the handle. If the bristles are heavy while the handle is light, the brush feels unstable in the hand; conversely, if the bristles are light and the handle is heavy, it becomes difficult to apply the right amount of pressure during use. Achieving a balance between the weight of the bristles and the handle places the center of gravity in the middle of the handle, ensuring optimal application results. By precisely weighing every brush, we deliver consistent quality and a superior makeup experience.
4.Combing
After weighing, the bristles may appear slightly disheveled and require combing to align them all in the same direction. Keeping the bristles neat and smooth helps correct any unevenness resulting from the previous processing step. It is essential to understand the specific type of bristles being used; whether they are synthetic bristles or natural hair, the combing process must be tailored to their unique characteristics. The tactile feedback and force required vary significantly depending on the material. Natural hair is softer and requires gentle handling to avoid damage or breakage caused by excessive pulling. Synthetic bristles are more elastic and may require slightly more force to straighten, yet one must still avoid rough handling that could cause the tips to split.
5.Bristle Tidying
We shape the bristles by inserting single or double strands; the rounded bristle tips are typically formed through compression in a cup-shaped mold. When loading the bristles into the mold, the goal is to ensure uniform distribution and prevent any misalignment. You can select the mold cup material that best suits your desired bristle quality; we offer a range of options, including nylon, rubber, wood, and plastic.
6.Bristle Binding
To prevent the bristles from splaying or losing their shape, wrap them tightly by hand with fine thread, adjusting the binding tension according to the volume of the bristles. The tension must be carefully controlled: if it is too tight, the bristles may be damaged; if too loose, they will not be held securely in place.
7.Roots Shaving
After the cord is wound, the brush head is trimmed—either by hand or machine—to refine its shape. Precision is crucial, as the trimming method determines how the brush interacts with the skin. High-speed rotating blades are used to rapidly trim away uneven, excess bristles at the tip, smoothing the surface while maintaining the desired shape.
8.Bristle Nesting And Thread Removing
Wrap the base of the bristles with a plastic sleeve and push it into the ferrule using appropriate force, ensuring the shape is maintained and the tips of the bristles are not damaged. Then, remove the binding thread and adjust the shape of the brush.
9.Size Measuring
Measure the bristle length to ensure consistency across all makeup brushes. The measurement is taken from the plane of the ferrule opening to the tips of the bristles; verify that this matches the manufacturing specifications and check for any "spring-back" in length caused by the removal of binding threads. Additionally, visually inspect or feel the bristle tips to ensure they are even and aligned. High-end brushes require minimal tolerance for error.
10.Ferrule Pressing
After the bristles are installed, we crimp the ferrule to secure them firmly in place. The shape of the ferrule is adjusted using appropriate pressure. During the crimping process, it is essential to keep the bristles neat and ensure precise alignment; this prevents the bristles from becoming uneven, which would compromise the appearance of the finished product. This step applies only to flat-head brushes.
11.Glue Injection
Glue is injected into the ferrule. A high-performance, waterproof adhesive—specifically formulated for makeup brushes—secures the bristles and prevents shedding, while also withstanding repeated use and contact with cosmetic products. The most challenging and critical aspect of this process is precisely controlling the amount of glue used. Our workers, backed by 20 years of manufacturing experience, ensure the dosage is perfect: sufficient to bond the bristle roots tightly to the ferrule, yet without any overflow.
12.Ferrule Rounding And Deburring
Use special pliers to adjust the shape of the mouthpiece ferrule until it is circular. Then, use a rotary file to remove any burrs from inside the ferrule to prevent scratching the handle.
13.Connect the Handle
The handle is attached to the metal ferrule to complete the brush assembly. We use custom-designed handles meticulously matched to the metal ferrules; the handle is secured with glue to ensure a firm, comfortable connection. Precision calibration tools are also employed to guarantee the brush is perfectly balanced, as a well-balanced brush ensures a more comfortable user experience.
If you are looking to create a popular line of makeup brushes for your brand, please contact Zeming. We will leverage our expertise to serve you, helping you successfully execute your project and boost your profits.